Updated 2026-05-17
Although Broadcom made VMware Pro free, they do not make it easy to download. I have not found a link on their website for downloading it. Well, I have found a link for downloading it, but it only works if you are alreaded logged into your Broadcom account or else it redirects you.
Even when you get to the download page, it is not easy to download it. When you hoover over the cloud download button, it changes to a circle with an X in it. This is because, you having not agreed to their terms of service, which is considerable higher up on the page. Furthermore, you can not just check the box by terms of service. This is not obvious, but have to click the link and open up the terms of service of service. Then, you have to click the back button, and now you can check the box and agree to their terms of service. Finally, you can download vmware.
It gets worse, as of May 2026, VMware 26.0.0, 26H1, the cloud download button is off the screen to bottom right, and you have to move your browsers horizonal scroll bar all the way to the right to even view the cloud download button.
This is not straight forward, and from the comments on the Internet, I am not the only one that found this confussing.
Installing VMware is not straight forward either.
First, make sure that virtualizatin is enabled in your bios/efi.
VMware will not run if Secure Boot is enabled!
The installation process requires that two small source code programs be compiled. This, requires the "gnc compiler and make". If you install these before you attempt to install VMware, then you will not even be aware that during the installation process to small programs were compliled.
To install the prerequistes:
sudo apt update && sudo apt install build-essential linux-headers-$(uname -r) gcc-12 make
VMware is not installed in the normal way either.
To install VMware:
sudo bash VMware-Workstation-Full-17.6.3.bundle
The current method (Mar 26) of updating VMware, is to manually download a new version from Broadcom and manually install it over the old version.
This will preserve your VMs.
When the host OS is updated, you may need to reinstall headers:
sudo apt install linux-headers-$(uname -r)
Guest OS need to installed under the user that they will be ran under. That is, you need to be a sudo user to install VMware. After installing the VMware program it will show up as an application in all users both sudo users and non-sudo user. However, after you install a Guest OS, the Guest OS will only show up under the user that it was installed under.
When installing a guest OS, under Virual Machine Settings -& Hardware -& Proccessors -& Virutalization Engine, all of the entries are greyed out except "Virtualize CPU performance counters". That is, I can not select the entry "Virtualize Intel VT-x/EPT or AMD-V/RVI" or the entry "Virtualize IOMMU (IO memory management unit"). However, after the VM is installed, I can select any or all of them.
On its own, VMware will only display a guest OS in a 640 by 480 window. To increase the window size, you have to install "vmware tools" or "open-vm-tools. As the name suggest, the latter is open source.
Therefore, I do not recommend installing a guest OS on a 4K monitor. The installation screen is too small, and you are going to struggle to read the text.
For Microsoft Windows, you do not have a choice. You must install VMware Tools [1,2].
For Linux, you can install either, but Broadcom, who owns VMware, recommends open-vm-tools [3]. It is installed by default by most Linux distros.
To use a 4K monitor on Linux, you are going to also have to use scaling.
For distros with a Gnome Desktop (Debian, Ubuntu, etc):
cd /usr/share/glib-2.0/schemas/
With vi or nano create the file:
90_hidpi.gschema.override
Place the following two lines in the file:
[org.gnome.desktop.interface]
scaling-factor=2
Compile the schema
sudo glib-compile-schemas /usr/share/glib-2.0/schemas
Kali has a built-in app HiDPI for scaling the desktop to 2x.
For general computing, I could not distinguish the difference. It is satisfactory for YouTube videos. However, for high resolution videos, there is a noticable diffence in the sharpeness.
On its own VMware will only display a guess OS in a 640 by 480 window. To use the whole screen you will have to install VMware Tools.
There a choice to be made here. Do you install Broadcom's VMware Tools or the open source version.
When I upgraded from VMware 17 to VMWare 25H2, it informed me that my version of VMware Tools was out of date.
At this point in time, I had a guest version of Windows 11 installed. I believe that before I had a guess Windows OS installed, there was a way to uninstall VMware tools. I could not find it. VMware menu heading are the same, but what is underneith them changes.
From what I read on the Internet, removing VMware tools from Windows requires making multable changes to Window's Registry.
At this point I asked myself was VMware really worth all this ???
Broadcom does support open-vm-tools [1]. However open-vm-tools may require X-windows [1]. THe devil is in the details. Reference [1] was last updated on 02-18-2025.
According to References [2,3], VMware Tools remains mandatory for Windows Guests. Again the devil is in the details.
The VMware Toolbar blocks the date and time. However, you can hide the VMware Toolbar.
To hide the toolbar, click on the push button icon and move the mouse pointer off of the toolbar.
To view the toolbar, move the mouse pointer to the top of the monitor. Optionally, you can click on the push button icon to pin the toolbar to the top of monitor.
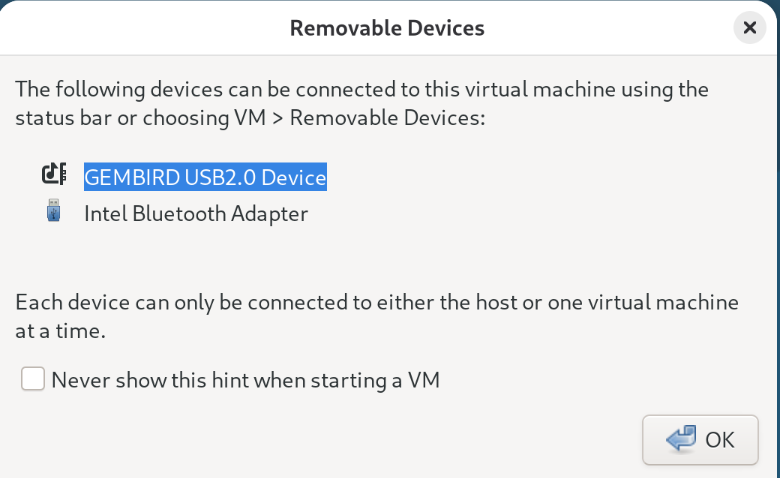
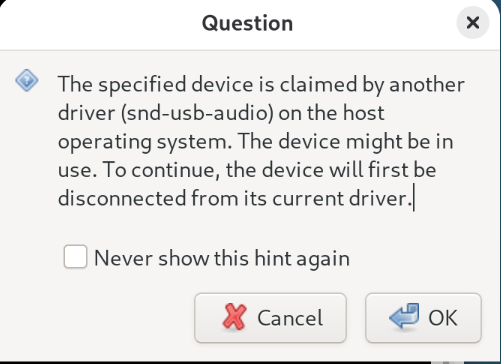
In order to connect a USB device to a VMware virtual machine, you must configure a USB Controller.
For some reson the default is USB 1.1, which means it is only compatible with USB 1.1 and USB 1.0. Changing the compatibility to USB 3.2 means it is compatible with USB 3.2, USB 3.0, USB 2.0 and USB 1.1.
To enable USB keyboards and mouse, you must enable the Show all USB input devices option.
References
Before VMware Workstation Pro 17.6 there was an option to share Bluetooth deives witht the virtual machine. Saddly, it has been removed.
After installing a Windows 11 Guess OS on VMware, I noticed that it said that Microsoft Windows was NOT Activated. When I attempted to activate it with my 25-digit code, it said that it was alread installed on another machine.
This is because VMware using a different ID than is in the BIOS/EFI.
At one time, there was a work arround for this. You could modify the VMware configuration file to make it use the ID that was in the BIOS, but I have found very little on this on the Internet. Most references say you need to purchase a new Version of Window OS.
To get Microsoft OS to work with a 4K monitor, I had to scale the OS. I followed Explaining Computers [1].
Start -> System -> Display -> Scale
He set his scale factor to 150%; I set mine to 200%.
Start -> System -> Accessibility -> Text size
He set the text size to 120%; I did the same
Start -> System -> Accessibility -> Mouse pointer and touch
He set it at 2; I did the same.
Start -> System -> Accessibility -> Text cursor
He set the thickness at 5; I did the same.
To download Firefox without using Microsoft's Edge Browser. Type PowerShell in the search box. Click on run as an Administrator. From the PowerShell prompt, use cd to navigate to the directory where you want the installation for for Firebox to be. Execute the curl statement below:
curl "https://download.mozilla.org/?product=firefox-latest&os=win64" -o install_firefox.exe
Be patient.
VMware resets the scaling factor to 100% everytime the window is resized. On a 4k (3180x2160), everything is too small. You can manual set the scaling to 200%, but the next time the window is resized, VMware will reset scaling to 100%.
The solution is to set the default scaling factor to 2.
Since both Debian and Ubuntu use Gnone, the same solutions works for both:
Create a new file with vi or nano:
sudo nano /usr/share/glib-2.0/schemas/90_hidpi.gschema.override
Place the following in the file:
[org.gnome.desktop.interface]
scaling-factor=2
Compile schemas:
sudo glib-compile-schemas /usr/share/glib-2.0/schemas
Reboot
Kali has a built-in app HiDPI for scaling the desktop to 2x.
To install a guest Debian on a Debian host, you must change the super key on the host or else you will not be able to use the super key on the guest.
On Debian Gnone the default super key is the key to the left of the space bar. You can change it to the key to the right of the space bar via "Gnone Tweaks":
Show Apps -> System -> Tweaks -> Keyboard -> Right Super
The following solution was found for Ubuntu, but it works for Debian and perhaps other distributions that use Gnome Tweaks.
Create a new file with vi or nano:
sudo nano /usr/share/glib-2.0/schemas/90_hidpi.gschema.override
Place the following in the file:
[org.gnome.desktop.interface]
scaling-factor=2
Compile schemas:
sudo glib-compile-schemas /usr/share/glib-2.0/schemas
Reboot
Before you can mount drives, you need to install cifs-utils:
sudo apt install cifs-utils
Ubuntu 26.04 is scheduled to be released on April 23, 2026.
By default, when you install a guest Ubuntu OS on VMware, it uses open-vm-tools instead of VMware Tools. Believe or not, as of Jan 2025, Broadcom recommends an open source tool over their own VMware tool [1].
With Virtual Machine Settings:
The bottom line is, everything is too small. To increase the size, you can use display scaling, but it is not persistent after a reboot. However, there is a workaround to change the default scaling factor from 100% to 200%. This requires making a two line schema configuration file and compling it [2,3]. The result was everything was a little too big for me. I tried using a scaling factor of 1.75, but the complier gave me an error. Since, I could not scale the display to something less than 200%, I scaled Firefox to 90%.
You can still right click on an empty space on the display, select "Display Settings" and change the scaling; it is just not persistent.
I installed kali Linux using the standard iso file and not the pre-built file for VMware. Kali Linux uses open-vm-tools-desktop. It appeared to not be installed on first boot, but after updating kali, it appeared to be installed [1].
You can sale the display, but it is not persistent. Instead use the built in app HiDPI, which is persistent [2]. This made Kali reasonable easy to fix scaling for 4K monitors.
I went through this process three times: VMware would run for 3 or 4 day, and then I could not access the Internet on the host even if I was not running VMware.
I could access the Internet by:
Nordvpn set Firewall disabled
Nordvpn Whitelist add port 53 protocol TCP
Nordvpn Whitelist add port 53 protocol UDP
sudo iptables -P INPUT ACCEPT
sudo iptables -F INPUT
sudo iptables -P OUTPUT ACCEPT
sudo iptables -F OUTPUT
sudo systemctl restart NetworkManager
The latter one (#4) was not persistent after a reboot.
I highly suspect Nordvpn because after I installed VMware, it added a chain that dropped dns request from IP addresses used by VMware.
# Warning: table ip filter is managed by iptables-nft, do not touch!
table ip filter {
	chain OUTPUT {
		type filter hook output priority filter; policy accept;
		ip daddr 169.254.0.0/16 tcp dport 53   counter packets 0 bytes 0 drop
		ip daddr 169.254.0.0/16 udp dport 53   counter packets 0 bytes 0 drop
		ip daddr 192.168.0.0/16 tcp dport 53   counter packets 0 bytes 0 drop
		ip daddr 192.168.0.0/16 udp dport 53   counter packets 240 bytes 17800 drop
		ip daddr 172.16.0.0/12 tcp dport 53   counter packets 0 bytes 0 drop
		ip daddr 172.16.0.0/12 udp dport 53   counter packets 0 bytes 0 drop
		ip daddr 10.0.0.0/8 tcp dport 53   counter packets 0 bytes 0 drop
		ip daddr 10.0.0.0/8 udp dport 53   counter packets 0 bytes 0 drop
	}
}
I had a second identical machine that was working correctly. I compared IP addresses, IPtables, and NFtables. They were the same.
Finally, I looked at the /etc/resolv.conf file:
# Generated by NetworkManager
sarch localATT
nameserver 192.168.30.1
I tried to change it, but it was immutable. To change it, I had to use the change attribute command:
sudo cattr -i /etc/resolv.conf
I changed the nameserver from my rounter gateway to cloudfare (1.1.1.1).
I reboot, and checked the /etc/resolv.conf file. It had changed, but this time, Nordvpn had changed it with it's dns servers:
# Generated by NordVPN
nameserver 103.86.99.100
nameserver 103.86.96.100
Finally, everthing was working !!!
I spent 3 or 4 days solving this problem, and this is not the first time, I have been biten by it.
I see what looks like Telimetry in:
/etc/vmare/config
This includes a UUID